
P
A Great Lefty Kit!
Finally there are Lefty Harley Benton kits! I have several Harley Benton guitars and all except one have been near perfect out of the box. So I had high expectations of the ST style kit and I have not been disappointed. I made six lefty kits last year with each one having basic issues that needed addressing during their builds.
I believe this is an ideal starter kit as the instruction booklet gives clear instructions for each stage of the build, with pictures, all screw holes are drilled ready and each part ready to fit with minimum tools. The kit makes a very playable instrument which may then be enhanced with advanced adjustment or upgraded parts. I enjoyed every minute my experience as you will read.
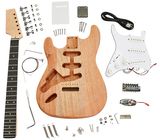
After a check to see all the parts are in the box my first step is to test fit the neck to body with bridge in place to see how they fit together. The neck fitted firmly in the pocket and a straight edge on the first fret along the neck met the saddles perfectly. An ideal start.
The website rightly gave a warning that the body had a coat of primer ready for paint so if staining was chosen this primer should be sanded off. I prefer to stain and finish with wipe on poly so I started sanding. Even with power sanding I could not remove the primer well enough to get to the wood. It may be possible to get to the wood but I moved to the paint option. I chose a purple nitrocellulose spray to do the body and headstock. Protectively clothed I started spraying in the garage with the doors open. I am now convinced stain and wipe on poly is the better way!
The result was a painted, lacquered body and headstock that I was quite pleased with for a first attempt at spraying. It is a little patchy in places if you look hard where I did remove some primer but that was my decision. However I do believe that spraying over the original primed body would have given a terrific finish.
The instructions suggest fitting the body hardware first as the neck fits over the scratchplate. The electrics connected by clip to the jack socket and the scratchplate was in place. The bridge and tremolo fitted in place as instructed. All screws matched the pre drilled holes and the body was finished.
The neck was very good and had a lovely feel. There was no need to tamper with the truss rod, no need for any spot fret levelling and there were no sharp fret ends. So after rubbing conditioner in the fretboard, polishing the frets and fitting the tuners the neck was ready.
Then the important part of bolting the neck on. Again the holes are in place in the body and in the heel of the neck. The long screws met the holes and the neck was in place. I then performed my earlier task of the straightedge along the neck and again it met the saddles at exactly the same point as my test earlier. A straight edge along each side of the neck met both sides of the bridge in the same place. So the neck was bolted at the correct angle and perfectly straight from nut to saddles. No need for shims to adjust to be correct. Outstanding fit! With strings on and tuned it was ready to see how it played. And with the electrics working it was very playable just after completion.
Now it needed a set up. It was good enough to ask a professional to do this if you haven’t the experience as this will be necessary to get the best from your new instrument. But having serviced my collection for years I set about my own fine adjustments.
Only two strings needed adjustment for near spot on intonation. Then by adjusting the saddles and the merest file of the nut slots I achieved an action of 1.25mm on the treble side which was playable fret by fret up to the 22nd, with bends! Amazing for a kit. A 1.5mm action would have given a more resonant string response but for my purposes I prefer 1.25mm. The tremolo did work but I did not give it a thorough test as I do not favour them so cannot comment on tuning stability with constant use. As an aside I will be making it hardtail.
As a first starter kit this one is an excellent choice. It has good instructions, neck and body wonderfully machined for fit and, with the hardware supplied, it makes a very playable instrument. If you want a challenging kit that needs holes drilled and soldered electrics this is not for you. Yes, the strings are not best but if supplied with a kit I see them as a tool in the build process and the tuners serve their purpose. But, most importantly for me, the neck and body are outstanding. If those parts do not fit well together then the best hardware in the world will not make a playable guitar.
This kit, now a guitar, feels as comfortable as the production models with a lovely neck and is a joy to play. For my home recording needs the hardware supplied is perfectly fine. My gigging days are long gone but I would not have hesitated to use this on stage, albeit with uprated hardware for that use.
Well done Thomann. Now a lefty DC 580 kit please!
I believe this is an ideal starter kit as the instruction booklet gives clear instructions for each stage of the build, with pictures, all screw holes are drilled ready and each part ready to fit with minimum tools. The kit makes a very playable instrument which may then be enhanced with advanced adjustment or upgraded parts. I enjoyed every minute my experience as you will read.
After a check to see all the parts are in the box my first step is to test fit the neck to body with bridge in place to see how they fit together. The neck fitted firmly in the pocket and a straight edge on the first fret along the neck met the saddles perfectly. An ideal start.
The website rightly gave a warning that the body had a coat of primer ready for paint so if staining was chosen this primer should be sanded off. I prefer to stain and finish with wipe on poly so I started sanding. Even with power sanding I could not remove the primer well enough to get to the wood. It may be possible to get to the wood but I moved to the paint option. I chose a purple nitrocellulose spray to do the body and headstock. Protectively clothed I started spraying in the garage with the doors open. I am now convinced stain and wipe on poly is the better way!
The result was a painted, lacquered body and headstock that I was quite pleased with for a first attempt at spraying. It is a little patchy in places if you look hard where I did remove some primer but that was my decision. However I do believe that spraying over the original primed body would have given a terrific finish.
The instructions suggest fitting the body hardware first as the neck fits over the scratchplate. The electrics connected by clip to the jack socket and the scratchplate was in place. The bridge and tremolo fitted in place as instructed. All screws matched the pre drilled holes and the body was finished.
The neck was very good and had a lovely feel. There was no need to tamper with the truss rod, no need for any spot fret levelling and there were no sharp fret ends. So after rubbing conditioner in the fretboard, polishing the frets and fitting the tuners the neck was ready.
Then the important part of bolting the neck on. Again the holes are in place in the body and in the heel of the neck. The long screws met the holes and the neck was in place. I then performed my earlier task of the straightedge along the neck and again it met the saddles at exactly the same point as my test earlier. A straight edge along each side of the neck met both sides of the bridge in the same place. So the neck was bolted at the correct angle and perfectly straight from nut to saddles. No need for shims to adjust to be correct. Outstanding fit! With strings on and tuned it was ready to see how it played. And with the electrics working it was very playable just after completion.
Now it needed a set up. It was good enough to ask a professional to do this if you haven’t the experience as this will be necessary to get the best from your new instrument. But having serviced my collection for years I set about my own fine adjustments.
Only two strings needed adjustment for near spot on intonation. Then by adjusting the saddles and the merest file of the nut slots I achieved an action of 1.25mm on the treble side which was playable fret by fret up to the 22nd, with bends! Amazing for a kit. A 1.5mm action would have given a more resonant string response but for my purposes I prefer 1.25mm. The tremolo did work but I did not give it a thorough test as I do not favour them so cannot comment on tuning stability with constant use. As an aside I will be making it hardtail.
As a first starter kit this one is an excellent choice. It has good instructions, neck and body wonderfully machined for fit and, with the hardware supplied, it makes a very playable instrument. If you want a challenging kit that needs holes drilled and soldered electrics this is not for you. Yes, the strings are not best but if supplied with a kit I see them as a tool in the build process and the tuners serve their purpose. But, most importantly for me, the neck and body are outstanding. If those parts do not fit well together then the best hardware in the world will not make a playable guitar.
This kit, now a guitar, feels as comfortable as the production models with a lovely neck and is a joy to play. For my home recording needs the hardware supplied is perfectly fine. My gigging days are long gone but I would not have hesitated to use this on stage, albeit with uprated hardware for that use.
Well done Thomann. Now a lefty DC 580 kit please!
2
1
Report
S
Great gift
Bought as a gift for my brother. He is delighted with it and having a great time painting and building it.
Hopefully it sounds good once built but certainly seems good quality
Hopefully it sounds good once built but certainly seems good quality
2
0
Report
N
Inconsistent Quality Still Recommended
The value for money is insanely good. This is my 2nd kit fuitar from thomann. 1st one was a thinline tele. The build quality on the thinline was twice as good. When you get so much for so little money I assume the QC at the end of the production line suffers a bit. The fretboard on this kit needed a bit of work, the frets were NOT rocking so it didn't need levelling but the frets needed polishing and ends needed dressing because they were a bit sharp. The pickup and electronics cavities had splinters in it. The visible bits were perfectly fine. Still a great buy. I will buy another kit.
0
0
Report